
this guide is just explaining what steps need to be taken to reach this exact goal using a PC with Win10 and an Arduino Uno as a Programmer for Attiny85 MCUs. It is by no means complete and maybe not of help to you. I compiled this from various sources and there are way better descriptions out there I’m sure.
1: What you need
Computer
Arduino Uno
Attiny85
Breadboard
Breadboard Cables
10-20uF capacitor
2: Add support for Attiny
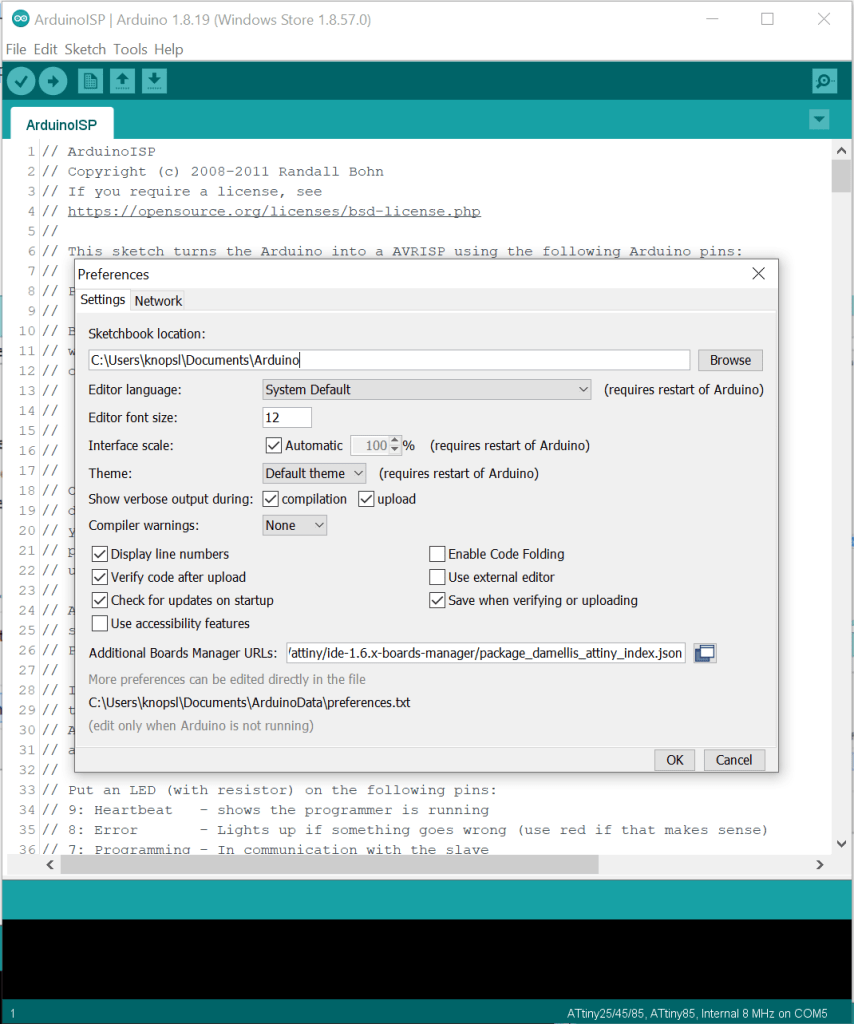
open File > Preferences
at the bottom in “Additional Boards Manager URLs” copy and paste this:https://raw.githubusercontent.com/damellis/attiny/ide-1.6.x-boards-manager/package_damellis_attiny_index.json
Now close the window and reopen the Preferences to check if the URL is still in there. If not, be aware that windows may block this action. you’ll get notified and if you follow that notification (click it), you can change that behaviour in the windows settings if you’re local admin of your computer.
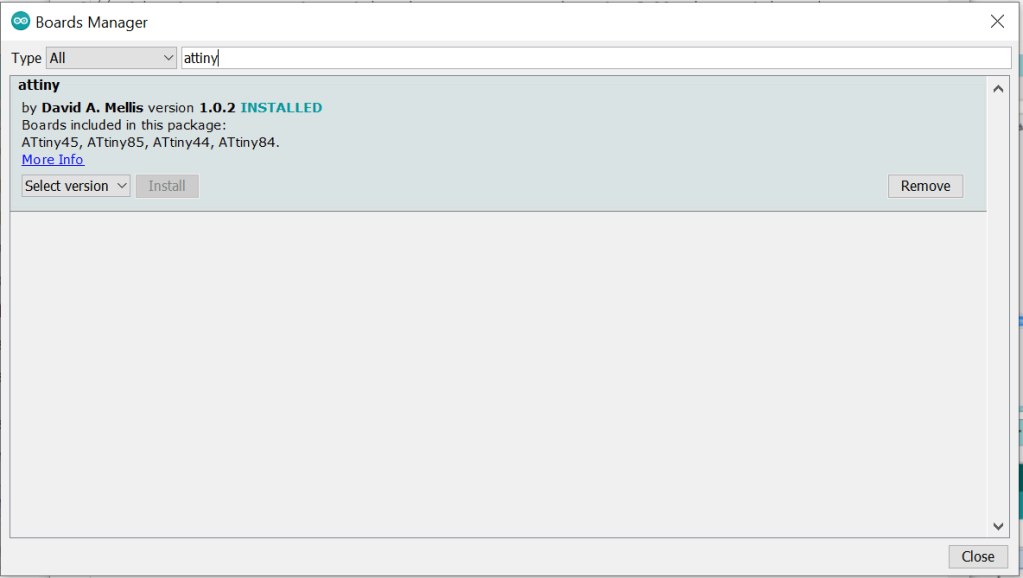
Next navigate to Tools > Board > Board Manager and see if you find attiny in the available boards. Install the latest version (by David A. Mellis).
To confirm that you have added support for the boards, navigate to Tools > Board and you should see ATtiny Microcontrollers at the bottom of the list.
3: Setup Arduino Uno as ISP
Navigate to File > Examples > ArduinoISP. Open the sketch and upload it to your Arduino.
4: Hardware setup

First connect the capacitor between reset and ground pins on the Arduino UNO. It’s important to connect the ground side of the electrolytioc cap (white/silver stripe or -) with ground
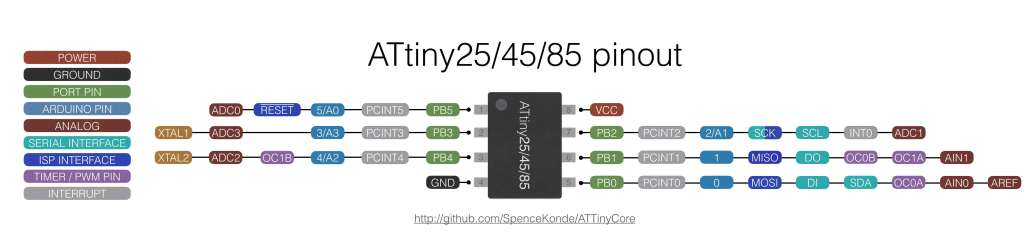
Now the connections between the Arduino UNO and the Attiny are:
- ArduinoUNO Pin D13 —> Attiny85 Pin 7 (SCK)
- ArduinoUNO Pin D12 —> Attiny85 Pin 6 (MISO)
- ArduinoUNO Pin D11 —> Attiny85 Pin 5 (MOSI)
- ArduinoUNO Pin D10 —> Attiny85 Pin 1 (RESET)
- ArduinoUNO 5V —> Attiny85 Pin 8 (VCC)
- ArduinoUNO Ground —> Attiny85 Pin 4 (GND)
5: (optional) Burn Bootloader
if you reuse an Attiny85 then you can skip this step. If not we need to burn the bootloader onto the fresh MCU. The following picture shows the config that has worked for me, mind that the COM Port needs to be correct for your machine. The actual program doesn’t matter for this step. You set it up like that and then click Burn Bootloader and wait for it to be done.

6: Upload some code 😀
using the same config as before you should have no problem uploading the blink example and testing your MCU.
